|
Accessories - Paintbrush |
|
|
|
|
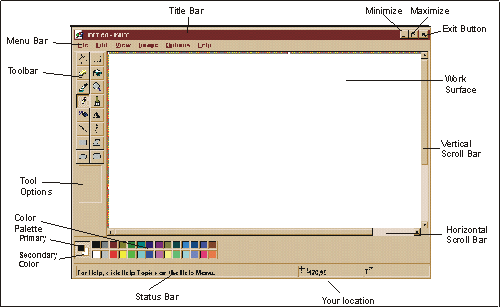
| Paintbrush is a drawing program. Drawings created in this program can be used as wallpaper for your computer. Similar to the picture on the refrigerator concept. It should be noted that this is a very rudimentary drawing program. If you discover you enjoy this medium, it would be advisable to purchase a more versatile program. |
| From the Start menu, choose Accessories,
then Paint
If the program is on your desktop, double click while
pointing at the icon
|
|
|
|
|
The program will open, if it does not take
up the entire area of your screen, maximize it. Following are the
default settings for this program.
What is the drawing going to be used for? For example: If you wanted to make a drawing that would fill up an entire page of printed material (allowing for the margins) you would want to set you drawing service to 6.97" wide by 9.43" long (we have discovered that Paint needs that extra couple of .02-3" to set the page properly) Should it be a picture for your desktop, the maximum you should make it would be the resolution size of your screen, (i.e. 800x600 pixels) |
|
Start drawing....
left mouse button to access the primary color. right mouse button to access the secondary color Note: If a secondary color has been assigned prior to starting a new drawing, the page will use that color as the background. |
left mouse button to assign the primary color, or the right mouse button to assign the secondary color |
|
|
| There are times when you want to take a closer look at an area of work, for this operation we use the zoom command. Almost every program has this feature. |
|
| There are a variety of tools available to you. Following is the basic procedure to using them. |
|
| Selecting tool | Left = Odd shapes
Right = Rectangular shapes Used with Cut and Copy options, described later. |
|
| Spray paint | Drag the mouse pointer. Use the left mouse button to
spray with the foreground color, or use the right mouse button to spray
with the background color.
The longer you leave your mouse stationary, the darker the color |
|
| Text tool | Click in the work surface, type the text.
To change the font style or size, select Font from the Text menu. If color is required, choose the color prior to typing. |
|
| Eraser | Move you mouse indicator to your work surface.
If you want the entire picture to be erased, double click on the eraser tool |
|
| Fill tool | Fills empty spaces with selected color. Ensure that the tip of the tool in positioned inside the area prior clicking. | |
| Brush tool | Freehand brush tool draws solid lines when mouse button
is held and dragged. There are different brush shapes to choose from.
To accomplish this
|
|
| Line draw | Right = Straight lines
Left = Curved line (use as follows)
Each curve must have at least one arc but no more than two. Repeat this step for a second arc. |
|
| Square boxes | Select the type of box you desire (Unfilled or Filled box) prior to starting the shape | |
| Rounded corner boxes | Select the type of box you desire (Unfilled or Filled box) prior to starting the shape | |
| Circles/Ovals | Select the type of box you desire (Unfilled or Filled
circle) prior to starting the shape.
If you want perfect circles, hold the shift key while dragging the mouse. |
|
| Polygons | Select the type of box you desire (Unfilled or Filled
polygon) prior to starting the shape.
To finish a polygon, double click at the last point of the polygon. |
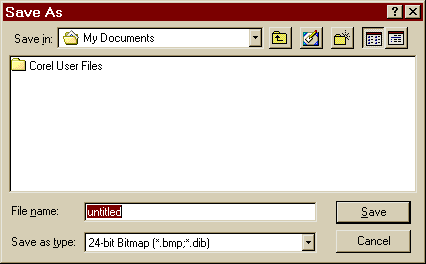
Use Save to save your document as a file.
Some Notes about saving
|
|
 |
|
|
| From the File
menu,
select New
or (Shortcut) Hold Ctrl tap N Note: If a secondary color has been chosen the new file background will use that color |
| There are often times when you want to move something
from its original position, or copy an item to somewhere else. When
those times happen use the following procedure.
Remember there are three questions that need to be asked
first,
|
From the Edit menu, choose Cut or use the Shortcut Hold Ctrl tap X. The area that was selected will disappear. If you want to copy the item,
use the Shortcut Hold Ctrl tap V. The object will reappear on screen with 8 little squares visible around it . |
| As with all humans, we make mistakes. Unlike drawing with pencils and paper, computers offer us this handy tool, so that we do not have to start a project over if we make a mistake. This operation is available in almost every program. Remember it, it is your best friend when dealing with computers. |
| From the Edit menu,
choose
Under
use the Shortcut Hold Ctrl tap Z |
![]()
|
Have a problem and can't
find the answer on our site?
Click Here To
Contact Us. |
|
Want to know what people say about us? Visit our Comments page. |
|
Let us know what you think about our site or want
to offer any suggestions. |
|
Thanks for visiting |
||
 |
|
 |
|
|
 |
|
|
|
 |
|
|
|
||
|
These links will lead you into our
framed website. It is best viewed at a screen
resolution of 1024 x 768
dpi, however, 800 x 600 dpi will
also work. |
||